guides
How to Build an Outdoor Cold Plunge: DIY Guide
Build a DIY outdoor cold plunge in a weekend: stock tank, chest freezer, or dedicated tub — plus filtration, chiller setup, and real costs.
 Marcus Reade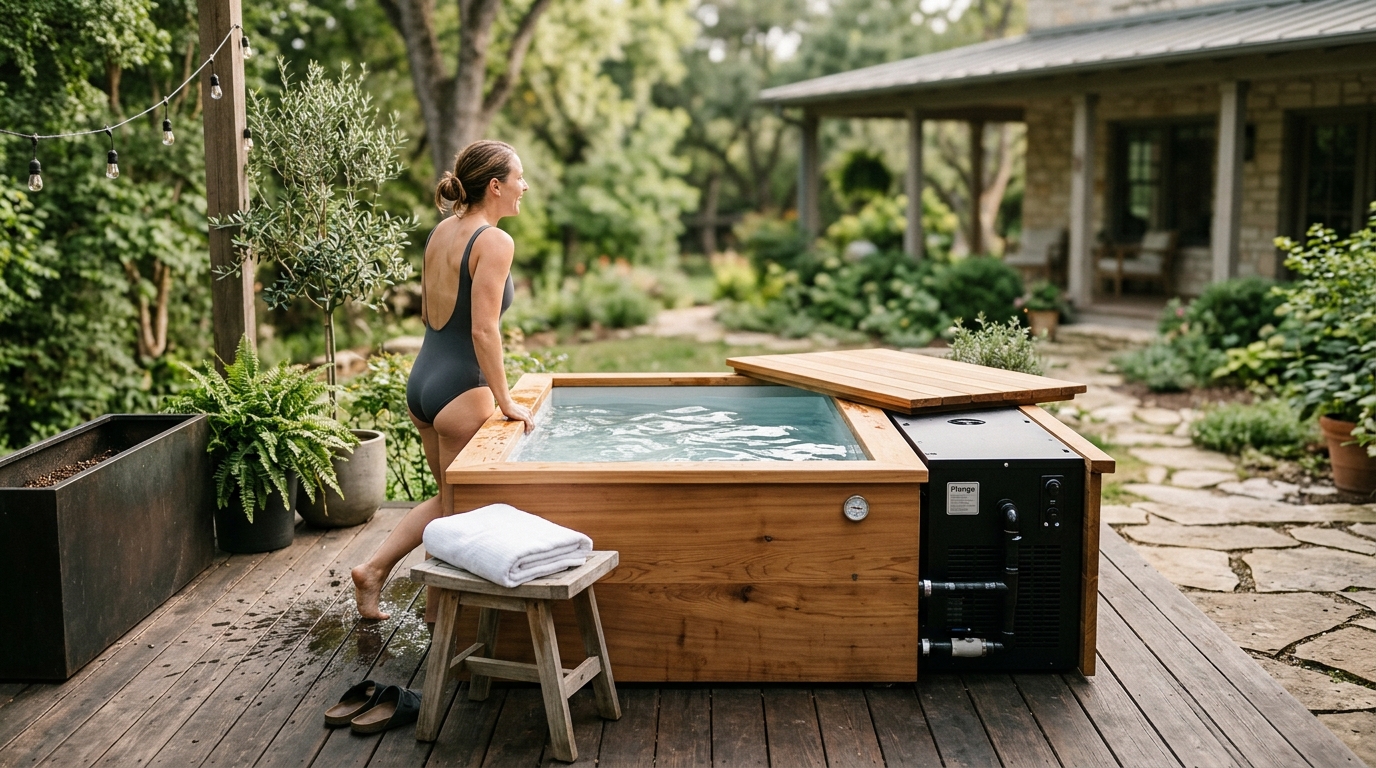
The fastest DIY outdoor cold plunge is a 100-gallon galvanized stock tank filled with water and cooled with ice or a plug-in chiller — total cost runs $200–400 and setup takes under two hours. Upgrade paths include a chest freezer conversion ($150–300 plus the appliance) or a dedicated fiberglass tub with a recirculating chiller ($1,200–3,000) for consistent cold on demand without buying ice.
Which DIY cold plunge build is right for you?
Three approaches dominate the DIY cold plunge scene. Each targets a different combination of upfront budget, maintenance tolerance, and target temperature.
| Product | Best for | Rating | Notes | |
|---|---|---|---|---|
| Stock tank with ice | lowest upfront cost and fastest same-day setup | ★★★★☆ | Fill and add ice every 2-3 days. Cost: $200-400. No electrical work required. | — |
| Chest freezer conversion | consistent sub-50F temps without ongoing ice purchases | ★★★★☆ | Requires a temperature controller. Freeze-down takes 24 hours. Cost: $200-400 plus the freezer. | — |
| Stock tank with plug-in chiller | balance of cost and convenience with no ice buying | ★★★★★ | Chiller clips to rim and circulates cooled water. Cost: $500-900. Easiest to maintain. | — |
| Dedicated tub with chiller | best long-term experience and built-in filtration | ★★★★★ | Professional-grade setup. Cost: $1,200-3,000. Consistent temps year-round with minimal effort. | — |
This guide covers all four builds in enough detail to finish any of them in an afternoon — starting with the stock tank, the choice that gets most people in cold water the same day they decide to start.
Step 1: Choose your container and size
Stock tanks
Galvanized steel livestock watering tanks sold at farm supply stores and online are the most popular DIY cold plunge container. The 100-gallon oval (roughly 52 inches long × 31 inches wide × 23 inches deep) fits one adult in a seated position and holds water to chest level. The 150-gallon oval (62 × 32 × 23 inches) gives more leg room and allows two people to plunge simultaneously. The 300-gallon round (72-inch diameter × 24 inches deep) is spacious but weighs over 2,500 lbs when full — plan your base very carefully before going this route.
Galvanized steel holds up outdoors without any sealing or treatment for 10–20 years. The one drawback is aesthetics: a farm tank looks utilitarian. Many builders construct a cedar or composite wood surround to dress it up, which costs $100–300 in lumber and a few hours of carpentry.
Chest freezers
A converted chest freezer produces the coldest consistent plunge temperatures (39–45°F) at the lowest ongoing cost. A standard 7-cubic-foot chest freezer (roughly 40 inches long × 24 inches wide × 33 inches deep) holds about 55 gallons — enough to submerge an adult to the shoulders when filled near the brim. A 14.8-cubic-foot model (roughly 57 × 30 × 34 inches) is considerably more comfortable and is the most popular size for cold plunge conversions. The key limitation: you plunge in a metal box rather than a tub-shaped vessel, which affects how comfortable the experience feels.
Dedicated cold plunge tubs
Acrylic, fiberglass, or rotationally molded polyethylene tubs shaped like an oversized bathtub are the most ergonomically comfortable option. These are not built from scratch — you purchase the shell and add a separate chiller unit. The tub itself costs $600–1,500; a quality recirculating chiller adds another $600–1,500. This combination offers the lowest ongoing maintenance, the most consistent temperatures, and the best overall plunging experience.
Step 2: Plan and prepare the site
Weight is the most critical site factor. A 100-gallon stock tank filled with water weighs approximately 850 lbs. A 150-gallon tank weighs 1,275 lbs. A 14.8-cubic-foot chest freezer with water weighs around 1,450 lbs. Any surface that supports a loaded vehicle also supports a cold plunge — but verify your specific setup before placing it.
Concrete pad. The simplest and most permanent base. An existing concrete patio or driveway requires no preparation beyond checking for level. A new 4-inch concrete pad for a 100-gallon tank costs $300–600 poured by a contractor, or $80–150 in materials for a homeowner with a wheelbarrow and screed board. A 5×7-foot pad handles any single-tank cold plunge setup.
Compacted gravel base. Excavate 6 inches, fill with 4 inches of compacted 3/4-inch clean crushed stone, and top with 2 inches of packed stone dust. A 6×6-foot area handles any stock tank. Material cost runs $100–200; renting a plate compactor for half a day adds another $60–80. Level this base carefully — even a 1-inch slope causes water to distribute unevenly and the tank to shift over months of use.
Composite deck. Before placing any cold plunge on an existing deck, verify that the joist spacing and beam sizing can handle concentrated point loads. A 100-gallon tank plus an adult occupant applies roughly 900–1,000 lbs to a small footprint — comparable to a corner of a hot tub. If the deck was not built for that load, add temporary support posts under the planned plunge location or move to a ground-level pad.
Privacy and drainage. Orient the plunge so you are not visible to neighbors during use. A fence panel, trellis with climbing plants, or outdoor privacy screen solves this for $50–200 and takes an afternoon to install. Also plan your drainage path before filling for the first time. A spigot or drain plug at the base of the tank, routed to a garden bed, lawn, or utility drain, prevents a muddy mess every time you change the water.
Step 3: Set up a stock tank cold plunge
The stock tank is the fastest build. Complete setup from an empty tank to a ready plunge takes 1–2 hours.
- Position the tank on your prepared pad. The 150-gallon oval weighs about 85 lbs empty — have a helper available for maneuvering it into position.
- Fill with a garden hose to within 4–6 inches of the rim. A 100-gallon tank takes 20–30 minutes from a standard outdoor faucet; a 150-gallon tank takes 30–45 minutes.
- Add ice for the first session. Add 40–80 lbs of bagged ice to cool tap water (typically 55–65°F) to target temperature (50–59°F). Check with a digital thermometer every 10–15 minutes. A 100-gallon tank typically reaches 55°F within 30–45 minutes with 60 lbs of ice.
- Install a recirculating pump. A submersible pump drawing water through a filter cartridge and returning it to the tank keeps the water clean between changes. Run the pump 4–6 hours per day. Without filtration, water kept more than 5 days becomes turbid and unsafe to plunge in.
- Add sanitizer. After the initial fill, add a non-chlorine oxidizer or standard pool chlorine tablets to prevent bacterial growth. Test pH (target 7.2–7.8) and free chlorine level (target 1–3 ppm) every 3–4 days using pool test strips.
- Clip a digital thermometer to the rim with the probe submerged. You need an accurate temperature reading before every session — guessing the temperature is not safe, particularly for new cold plungers.
- Cut an insulated cover. A 2-inch rigid foam insulation board (available at any home center) cut to the tank dimensions costs $15–25 and reduces the daily temperature rise from 10–15°F (uncovered) to 3–5°F (covered). Add a handle from a wood scrap for easy removal.
Ice strategy vs. chiller
Buying ice works well if you plunge 1–2 times per week and live within a short drive of a store that sells bagged ice in bulk. At $20–40 per session in ice, the annual cost for a three-times-per-week plunger runs $3,000–6,000. A plug-in chiller ($400–600) pays for itself within 2–5 months at that frequency. If you plunge more than twice a week, buy the chiller first.
Step 4: Convert a chest freezer into a cold plunge
The chest freezer conversion is the cheapest path to consistent sub-50°F water temperatures. It requires one electrical modification that takes about 30 minutes.
- Acquire a chest freezer in the 7–15 cubic foot range. A used appliance in working condition from a resale app costs $50–150; a new 7-cubic-foot model costs $250–400. Verify the lid seal is intact — a compromised lid lets warm air in and runs the compressor continuously.
- Install an external temperature controller. A plug-in temperature controller overrides the freezer’s built-in thermostat, letting you set a precise water temperature rather than the appliance’s standard freezing range. The controller plugs into the wall; the freezer plugs into the controller. Set the temperature probe inside the freezer, submerged in water, and dial in your target (typically 50–55°F for beginners; 39–45°F for experienced users). The controller activates and deactivates the compressor to hold that temperature.
- Add a food-safe liner (recommended). A precut bathtub liner, heavy-gauge food-grade poly tarp, or purpose-cut HDPE sheet placed inside the freezer before filling reduces direct contact between the water and the metal walls. Prolonged water contact with galvanized or zinc-coated steel can slowly leach trace metals over months of use.
- Fill with water to within 2 inches of the rim.
- Allow 18–24 hours for initial freeze-down. The compressor needs a full day to bring 55–80 gallons of room-temperature water to target temperature. Do not plan your first session the same afternoon.
- Sanitize. Cold water slows bacterial growth significantly compared to a hot tub, but it does not eliminate it. Add chlorine tablets and test the water weekly. A small recirculating pump is optional but useful for preventing water stratification and speeding chemical distribution.
Getting in and out of a chest freezer requires stepping over a 30–34-inch wall, which is physically demanding and can be awkward when cold. Build a short 2-step stool from 2×4 lumber — two treads with a frame takes about 30 minutes and makes entry safe.
Step 5: Add a plug-in chiller to a stock tank
A recirculating chiller converts a stock tank from an ice-dependent setup into a fully automatic cold plunge. The chiller unit hangs on the tank rim, draws water in through a hose, cools it through a refrigeration coil, and returns the cooled water to the tank. It also circulates the water continuously, which eliminates the need for a separate pump and provides built-in filtration through a mesh intake screen.
Set the chiller thermostat to your target temperature. The unit runs a cooling cycle whenever the water warms above setpoint and shuts off when it drops to temperature. Most residential chillers draw 500–1,000 watts during active cooling; a typical cycle on a 100-gallon tank at ambient 75°F weather lasts 20–30 minutes per hour, for a monthly electricity cost of $15–35.
Choose a chiller rated for your tank volume. An underpowered unit runs continuously and wears out the compressor within one season. Look for a unit with an IP67 waterproof rating on the body, a real-time water temperature display, and a filter housing you can clean without tools.
Essential equipment
Best for entry-level DIY cold plunge with an ice or chiller strategy
100-Gallon Galvanized Oval Stock Tank
The 100-gallon galvanized steel oval tank is the standard starting point for a DIY cold plunge. It holds one adult in a seated position with water to chest level, has no seams to leak, and holds up outdoors for 10-20 years without treatment. Look for tanks listed as 100-gallon oval — approximately 52 by 31 by 23 inches. Budget \$150-250 from a farm supply source or online retailer.
★★★★★ 4.5 · 1,240 reviews
Check current price on Amazon→Best for chest freezer cold plunge conversions — precise water temperature control
Inkbird ITC-308 Plug-In Temperature Controller
The Inkbird ITC-308 is the most widely used temperature controller for chest freezer cold plunge conversions. It plugs between the freezer and the wall outlet and overrides the built-in thermostat, preventing water from freezing solid. Set your target temperature (39-55F range is typical for cold plunge use) and the controller cycles the compressor to hold it. At \$35-50, it is the most cost-effective single component of the chest freezer build.
★★★★★ 4.7 · 18,500 reviews
Check current price on Amazon→Best for stock tank setups where consistent cold is needed without ongoing ice purchases
Portable Cold Plunge Chiller for Stock Tanks (up to 150 Gal)
A plug-in recirculating chiller eliminates the ice-buying cycle and keeps a stock tank at a set temperature around the clock. The unit hangs on the tank rim, cools water through a refrigeration coil, and returns it — serving as pump, filter, and chiller in one device. Look for units rated for your tank volume with a real-time temperature display and an IP67 waterproof rating. Budget \$400-600 for a quality entry-level chiller rated to 100-150 gallons.
★★★★☆ 4.4 · 870 reviews
Check current price on Amazon→How to maintain cold plunge water
Water maintenance is the piece most first-time builders underestimate. The approach depends on how often you change the water.
Weekly water changes (simplest approach). No filtration system is required. Drain the tank, rinse the interior with a garden hose, and refill. Add ice or let the chiller reach temperature. This eliminates chemical management entirely but uses more water and requires a drain plan.
Water kept longer than 7 days. You need a recirculating pump drawing through a filter cartridge, a sanitizer protocol, and a testing routine. Run the pump 4–6 hours per day. Test pH (target 7.2–7.8) and free chlorine (target 1–3 ppm) every 3–4 days. Shock with non-chlorine oxidizer once per month.
Preventing biofilm. If you notice a slick coating developing on interior tank surfaces after 3–4 weeks, drain the tank, scrub with a diluted household bleach solution (1 tablespoon bleach per gallon of water), rinse thoroughly with a garden hose, and refill. A monthly scrub prevents biofilm from establishing and extends the interval between full water changes.
Extending water clarity. The single most effective step: shower before each plunge. Body oils, sweat, and personal care products cloud the water faster than anything else. A quick rinse before entry can double or triple the days between full water changes.
FAQ
Frequently asked questions
How long does it take to set up a DIY cold plunge?
What temperature should a DIY cold plunge be?
Can I use a chest freezer as a cold plunge?
How do I keep water clean in a DIY cold plunge?
Do I need a chiller or can I just use ice?
Do I need a permit to build an outdoor cold plunge?
Bottom line
A 100-gallon galvanized stock tank with an ice strategy gets you in cold water the same afternoon you order the tank, for under $400 total. Add a $400–600 plug-in chiller within the first few months and the ice cost disappears while the setup becomes fully automatic. The chest freezer conversion offers the coldest achievable temperatures for the lowest ongoing cost if you are comfortable installing a temperature controller. Whichever build you choose, place it on a level surface rated for the full water weight, set up a basic filtration and sanitizer routine, and the plunge will serve you year-round with minimal upkeep.
For temperature protocol and session timing, see the cold plunge temperature guide. To compare a plunge against a bag of ice in the bathtub, read cold plunge vs. ice bath. For dedicated chiller unit comparisons, check the best cold plunge chillers roundup. To pair cold therapy with sauna sessions, see the contrast therapy guide.