guides
How to Do Contrast Therapy at Home
Step-by-step guide to contrast therapy at home: protocols, beginner tips, budget setups, and equipment picks for your first heat-cold session.
 Marcus Reade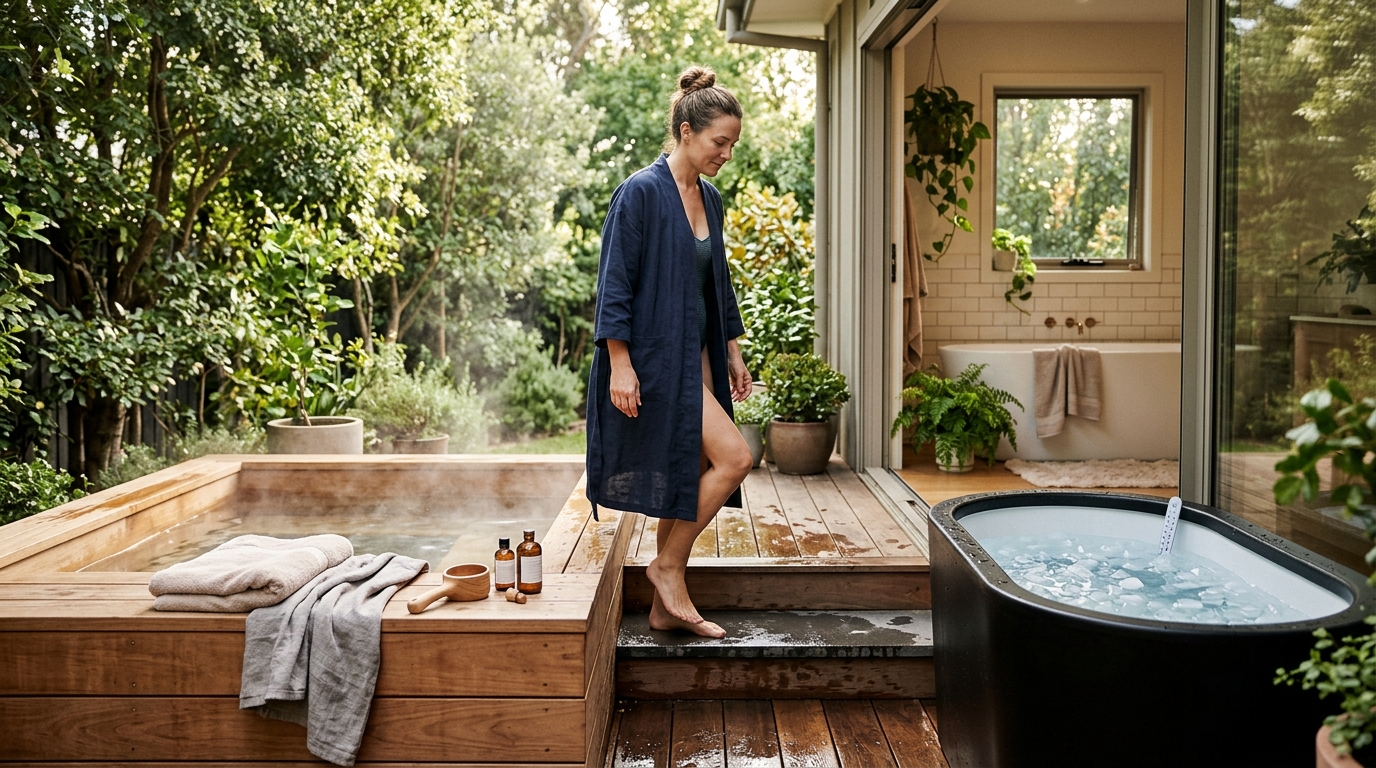
To do contrast therapy: enter a sauna at 160–195°F for 10–15 minutes, then move to a cold plunge or cold shower at 50–59°F for 2–3 minutes. Repeat that cycle 2–4 times per session. Finish cold for energy and focus; finish hot to relax. That is the complete beginner starting point.
What equipment do you need to start?
You need two things: a heat source that reaches at least 160°F, and a cold source that holds 50–59°F. Everything else is optional. Here is how each tier looks in practice:
| Product | Best for | Rating | Notes | |
|---|---|---|---|---|
| Shower-based (no cost) | Testing the contrast therapy habit before spending anything | — | Hot shower at maximum heat, then switch fully cold for 30-60 seconds. Lower stimulus than true immersion but enough to build the habit and experience the neurochemical response. | Check price |
| Portable sauna plus ice bath ($300-1,500) | Beginners who want real contrast therapy without a permanent installation | — | A portable infrared or steam tent plus a stock tank or inflatable tub packed with ice. Requires 20-30 lbs of ice per session. Gets you the full protocol at low cost. | Check price |
| Dedicated sauna plus chiller tub ($3,000-10,000) | Frequent practitioners who want zero-friction daily access | — | A 1-2 person electric sauna cabin plus a dedicated cold plunge tub with a built-in chiller. No ice prep. The chiller holds 50-59°F automatically, so both stations are always ready. | Check price |
| Full spa installation ($10,000+) | Permanent outdoor or indoor spa with 2-4 person capacity | — | Permanent cedar sauna cabin, commercial cold plunge with ozone filtration, deck integration. Highest convenience and lowest ongoing friction. Daily use is the norm at this tier. | Check price |
How to do contrast therapy: step-by-step
This is the standard 3-cycle contrast therapy session. It takes 60–75 minutes and covers the full physiological protocol used in recovery research.
Before you start
- Drink 16–24 oz of water. Do this 30–60 minutes before starting, not right before entering the sauna. Adequate hydration determines how sustainable a multi-cycle session is.
- Eat light or not at all. Avoid a heavy meal within 1–2 hours. Blood flow competes between digestion and temperature regulation in the heat — a full stomach in the sauna commonly causes nausea.
- Prepare your cold source. If you are using ice, fill the tub now — it takes 20–30 minutes to reach the right temperature. If you have a chiller unit, confirm it is pre-set to 50–55°F. A cold source that is not ready forces a long transition window and undermines the protocol.
- Place a water bottle near your cold plunge. You will want a sip during rest periods.
- Set a timer. You will be tracking heat and cold intervals across 3 cycles. A sand timer or your watch works well; leave your phone outside the sauna since heat degrades the battery and display.
Cycle 1: First heat round (10–12 minutes)
Enter the sauna and sit on the lower bench for the first 2–3 minutes while your body adjusts. Beginners often feel fine immediately and move to the upper bench too quickly — in a traditional sauna the upper bench can be 20–30°F hotter than the lower bench. Take 2–3 minutes to gauge the heat before moving up.
For your first session, target 10–12 minutes total. You should be sweating freely by the 7–8 minute mark. If you are not sweating by 10 minutes, either your sauna is not at temperature (check with a bench-level thermometer) or you need more time to acclimate — add 2 minutes and reassess.
If you have a traditional sauna with stones and a ladle, add a small amount of water (half a ladle) at the 5–6 minute mark. The steam burst raises perceived intensity without raising the thermometer reading. Wait 60 seconds after each pour before adding more.
Cycle 1: First cold phase (2–3 minutes)
Exit the sauna and enter your cold source within 60–90 seconds of leaving. The transition speed matters — this is the trigger for the vascular pump response that makes contrast therapy distinctly more effective than heat or cold alone.
First-time cold plunge: Lower yourself slowly into water at 50–59°F. Your body will want to gasp. Before entering, take 3–4 slow, deep breaths. Once in, focus on slowing your exhale — a 4-second inhale and 6-second exhale cycle lets the initial cold shock pass in about 20–30 seconds. After that first 30 seconds, most people find a cold plunge tolerable or even pleasant.
Stay for 2 minutes minimum. Three minutes is the standard for a full protocol. Do not stay longer than 5 minutes on your first session — hypothermia risk rises once you are already depleted from the sauna round.
If you are using a cold shower instead of a plunge: turn the tap fully cold for 60–90 seconds, directing the stream at your upper back and chest where cold receptors are densest.
Rest: After cold, rest 2–5 minutes in a neutral-temperature area before the next heat round. Breathe normally. You should feel alert, clear, and slightly energized.
Cycles 2 and 3: Repeating the pattern
Rounds two and three follow the same structure: 10–15 minutes in the sauna, 2–3 minutes cold, brief rest. Most practitioners find the second round of heat feels more intense than the first — your body is sensitized to the temperature swing and the contrast becomes sharper. This is expected and not a warning sign.
By cycle 3, the cold immersion typically feels easier than cycle 1. The acute cold shock response diminishes as your autonomic nervous system adapts across the session, and many people describe a calm, meditative state during their third cold round that first-timers do not experience until session 3 or 4.
How to finish your session
Finish cold if your goal is energy, alertness, and sustained focus for the hours ahead. A cold finish locks in the norepinephrine and dopamine surge from your final cycle, which remains elevated for 2–4 hours post-session.
Finish hot if your goal is relaxation and improved sleep. A final 10–15 minute sauna round with no cold afterward promotes the deep muscle relaxation and body temperature drop that supports slow-wave sleep. This effect is most pronounced when the session is done in the evening.
After your final round:
- Cool down completely to near-resting heart rate before leaving
- Drink another 16–24 oz of water plus electrolytes after a full 3-cycle session
- Eat a moderate meal or snack within 30–60 minutes if you are hungry
- Sit in a cool area for 5–10 minutes before driving — the post-sauna state is temporarily hypotensive
How to build up as a beginner
Do not jump to 3 full cycles in your first week. Here is a realistic progression that builds heat and cold tolerance safely:
Weeks 1–2: Two cycles per session. 10 minutes heat, 2 minutes cold, 3-minute rest, repeat once. Total session: 35–40 minutes. Focus on breathing control during the cold phase and exiting the sauna before you feel depleted.
Weeks 3–4: Two or three cycles per session. Extend heat rounds to 12–15 minutes as your heat tolerance builds. Extend cold to 3 minutes once the shock response diminishes, which typically happens around session 4–6.
Month 2 onward: Three cycles per session at the full 15/3/3 protocol. Add a fourth cycle on days when you feel strong and have extra time. Stay at 3 cycles for most sessions — the law of diminishing returns kicks in sharply after 4 cycles, and the extra time rarely adds proportional benefit.
Frequency: Start with 2 sessions per week. In weeks 3–4, increase to 3 sessions. Experienced practitioners often do 4–7 sessions per week, but 3 sessions per week is the evidence-based sweet spot for most people balancing results with time commitment.
Equipment picks for your home setup
Best for outdoor or cabin installations where you want authentic dry heat without an electrical hookup
Harvia M3 Wood-Burning Sauna Heater
The Harvia M3 is the standard Finnish wood-burning sauna heater used in traditional bathhouses for decades. It heats a 212-353 cubic foot room to 185-195°F in 30-45 minutes and holds that temperature through a 3-cycle contrast session without reloading wood. The large stone capacity (77 lbs) produces dense, even steam when you ladle water. For authenticity and off-grid capability, nothing in the price range competes.
★★★★★ 4.8 · 640 reviews
Check current price on Amazon→Best for home contrast therapy setups where you want automatic cold temperature without buying ice daily
Cold Plunge Tub with Chiller Unit
The biggest friction in contrast therapy is the transition window between sauna and cold. A chiller unit holds 50-58°F automatically — no ice shopping, no 20-minute prep. For anyone doing contrast therapy 3 or more times per week, the cost of ice plus prep overhead adds up quickly. A quality chiller tub turns contrast therapy from a production into a frictionless daily habit. Look for units with ozone or UV filtration to keep the water clean between sessions.
★★★★★ 4.5 · 1,480 reviews
Check current price on Amazon→Best for confirming bench-level sauna temperature and tracking cycle intervals without a phone
Sauna Thermometer and Sand Timer Set
Effective contrast therapy requires genuine heat — below 160°F at bench level, the vasodilatory response the cold phase depends on is not being generated. The thermometer built into most heaters reads at ceiling level, often 30-50°F higher than where you actually sit. A bench-mounted analog thermometer plus a 15-minute sand timer is the minimal monitoring kit for every contrast therapy session. Budget $40-60 for both.
★★★★★ 4.6 · 1,950 reviews
Check current price on Amazon→Common contrast therapy mistakes to avoid
Skipping the transition window. The sauna-to-cold window should be under 90 seconds. Long transitions — toweling off thoroughly, walking slowly to the plunge — let your core temperature drop before cold exposure and reduce the vascular pump response. Have your cold source immediately adjacent to your sauna exit and your path clear before you begin the session.
Cold water that is too warm. A cold shower at 68–72°F will feel cold after a sauna, but it does not produce the norepinephrine surge or vasoconstriction of genuine cold immersion. Target 50–59°F with a thermometer, not by feel alone. If your cold plunge does not have a thermometer, add one.
Too many cycles too soon. Adding a fourth or fifth cycle before your body has adapted to three cycles leads to exhaustion rather than recovery benefit. Three cycles done consistently is more effective than four cycles done irregularly and poorly.
Drinking alcohol before or during. Alcohol compounds dehydration, impairs the body temperature regulation sauna relies on, and can cause dangerous blood pressure drops during cold exposure. Enjoy a cold drink after the session is completely done.
No cool-down after the final round. Ending the session abruptly — showering, dressing, and leaving immediately — without allowing heart rate to return to near-resting produces lightheadedness and occasionally fainting. Sit in a cool area for 5–10 minutes after your final round before moving on.
Inconsistent temperatures. Contrast therapy benefits require genuine heat (above 160°F at bench level) and genuine cold (below 59°F). Many people assume their sauna and cold plunge are at the right temperatures without verifying. A $20 analog thermometer in each prevents sessions that feel like contrast therapy but miss the physiological window.
How to tell if contrast therapy is working
Most practitioners notice tangible changes within 2–3 consistent weeks:
Mood and focus: The post-session state — calm alertness with slightly elevated energy — should be noticeable within 1–2 sessions. Sustained mood improvement from dopamine normalization takes 2–4 weeks of consistent practice to become a background characteristic rather than a post-session spike.
Recovery speed: Reduced muscle soreness 12–24 hours after hard training is typically noticeable within the first 2–3 sessions. If you are not seeing recovery benefit, check that your cold exposure is cold enough (50–59°F) and your sauna is hot enough (at least 160°F at bench level).
Sleep quality: Better slow-wave sleep is most pronounced in the 1–2 nights following a session. Evening sessions finished with heat produce the strongest sleep benefit. If sleep is not improving after 2 weeks, try moving sessions to earlier in the day — sessions within 2 hours of bedtime occasionally overstimulate rather than relax.
Cold tolerance: Your tolerance to the cold phase should improve significantly within 4–6 sessions. If it feels exactly as difficult at session 8 as it did at session 1, your breathing technique during cold exposure may be the issue — hyperventilating prevents the autonomic adaptation that makes cold immersion progressively easier.
FAQ
Frequently asked questions
Can you do contrast therapy without a cold plunge tub?
How long should you wait between sauna and cold?
Is contrast therapy safe for beginners?
How soon after working out should you do contrast therapy?
What should you eat before contrast therapy?
How many times a week should you do contrast therapy?
Bottom line
Contrast therapy at home requires a heat source above 160°F, a cold source at 50–59°F, and the discipline to cycle between them 2–4 times per session. Start with two cycles per session and two sessions per week, then build from there. The neurochemical and recovery benefits are reliable and well-documented — but only if your temperatures are in the effective range and your transitions are fast.
For sauna setup options, see our best home saunas guide and how to use a sauna tutorial. For cold immersion gear, browse our best cold plunge picks and best cold plunge chillers roundup. For a deeper look at the science behind each phase and protocol variations, read our full contrast therapy guide.