guides
How to Build a Barrel Sauna: Step-by-Step Guide
Build a barrel sauna from a kit in one weekend: foundation prep, stave assembly, heater install, benches, and exterior finish with product picks.
 Marcus Reade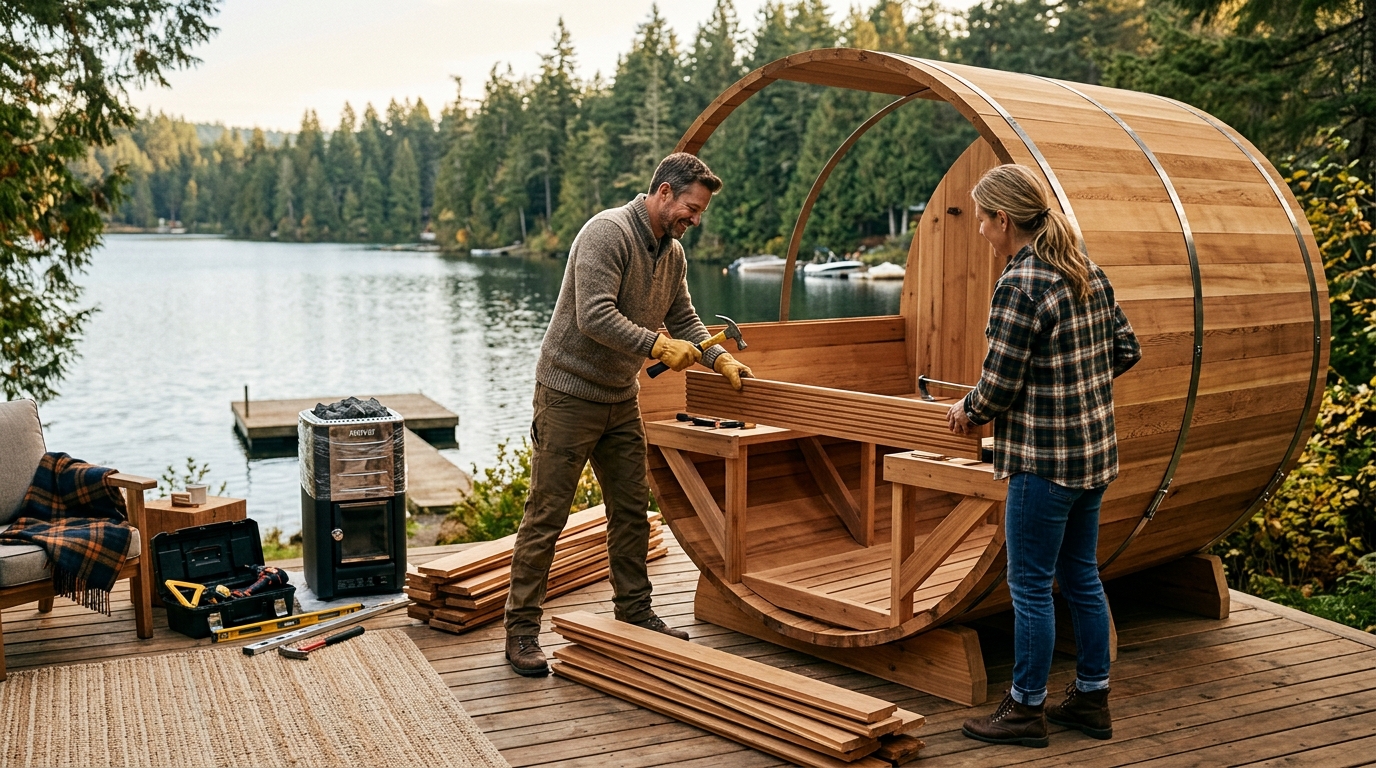
Building a barrel sauna from a kit takes one weekend — roughly 8 to 16 hours for two people — and costs $2,000–$5,500 depending on diameter, length, and wood species. Prepare a level gravel or concrete pad, assemble the pre-curved cedar staves with the included steel banding, hang the prehung door, install the heater, and build the interior bench system. DIY from raw lumber is possible but rarely worth it — commercial kits are cheaper than sourcing pre-curved staves yourself and arrive with every fastener and fitting accounted for.
Kit vs. scratch build vs. pre-assembled unit
Choose your build path before ordering anything — each has different tool requirements, cost, and labor.
| Product | Best for | Rating | Notes | |
|---|---|---|---|---|
| Pre-cut barrel sauna kit | most buyers — DIY-friendly with minimal carpentry | ★★★★★ | Staves arrive pre-curved and pre-cut. All bands, hardware, and door prehung. Assembly 8-16 hours. $2,000-5,500. | — |
| Scratch build (raw lumber) | experienced woodworkers with a jointer, planer, and curved-stave jig | ★★★☆☆ | Requires cutting curved barrel staves to exact radius — most DIYers find kit cost lower than time + tooling. Only for specialists. | — |
| Pre-assembled unit (freight shipped) | zero carpentry budget, fastest setup | ★★★★☆ | Arrives mostly assembled. Highest price point ($5,000-12,000). Freight logistics and crane access can be complicated. | — |
For the vast majority of buyers, a pre-cut kit is the correct answer. This guide covers the kit build path.
Step 1: Choose the right size and site your barrel
Diameter. The two standard interior diameters are 6 feet and 7 feet (exterior diameter is typically 6 to 8 inches larger). A 6-foot interior fits two people comfortably on opposite benches; three people requires some coordination. A 7-foot interior is genuinely roomy for four and workable for five. Size up if any members of your household are tall — head clearance at the upper bench is determined by the arc of the barrel.
Length. Most kits come in 7-foot or 8-foot lengths for the 6-foot diameter, and 8-foot or 10-foot for the 7-foot diameter. Longer barrels add a changing room vestibule at the front — a feature worth having in cold climates so you are not stepping from 180°F directly into 20°F air.
Site selection. The ideal barrel sauna site has:
- Full sun exposure on the roof to help the wood dry between sessions and extend stave life
- At least 3 feet of clearance on all sides for maintenance access and fire code compliance
- A wood-burning chimney clearance of 3 feet above the highest point of the structure (NFPA 211 standard)
- A short, well-lit path to the house for between-round trips
- Proximity to a cold plunge, outdoor shower, or garden hose for cooling
Heater decision. Make the heater decision now because it affects foundation design and siting. Wood-burning stoves need no electrical infrastructure but require a through-roof flue installation. Electric heaters (typically 4–9 kW) need a 240V circuit run from your panel — plan the conduit path before you pour concrete.
Step 2: Prepare the foundation
A level foundation is non-negotiable for a barrel sauna. The cylindrical assembly depends on all staves sitting in the same plane; if the foundation is off by more than 1/4 inch across the length, the staves will not close tight and heat will escape at every gap.
Foundation options:
- Compacted gravel pad: Most popular and easiest. Excavate 4–6 inches, fill with 3/4-inch crushed stone, and compact in 2-inch lifts with a plate compactor. Inexpensive and handles drainage well — water and rain drain through naturally. Size the pad at least 2 feet wider and 2 feet longer than the barrel footprint.
- Concrete slab: Most permanent. Minimum 4-inch slab with rebar or wire mesh. Excellent if you plan to park the barrel in one spot indefinitely. Requires forming, pouring, and 28 days of cure before full load.
- Pressure-treated timber skids: Two 4x6 or 6x6 pressure-treated beams run along the length of the barrel. Fastest to install; works on relatively level ground. Avoid ground contact wood that is not rated for that use — the chemical treatment off-gases at sauna temperatures if any portion is exposed inside.
- Concrete deck blocks: Precast blocks set at each corner and along the length, then leveled with shims. Works well on slightly sloped ground because each block height is independently adjustable.
For most backyard installs on level-ish ground, compacted gravel with two timber skids on top is the fastest reliable setup. Budget a full day for site prep and leveling — rushing this step causes more rework than any other.
Step 3: Assemble the barrel (stave installation)
This is the sequence for a standard kit assembly. Read the full kit manual before starting — some manufacturers reverse the order of banding.
- Set the end rings. Most kits start with two pre-built circular end frames that define the barrel’s diameter. Set them on your foundation at the correct spacing (equal to the barrel length) and check both for plumb and level.
- Stand the floor staves. Begin with the bottom arc — typically 4 to 6 staves that form the floor of the barrel. Most kits include a temporary assembly strap that holds these in position while you work. Some kits have you lay the assembly horizontally and roll it upright after.
- Add wall staves progressively. Work up both sides simultaneously, alternating left and right. The kit manual typically specifies the order; following it prevents the assembly from racking to one side. Have a second person hold staves upright while you fit each tongue-and-groove joint.
- Install temporary bands. Once roughly 75% of the staves are placed, slide the metal bands over the assembly. Do not tighten yet — bands are guides at this stage.
- Close the top. The final staves at the apex are the tightest fit. Drive them into place with a rubber mallet — steel hammer faces will dent the cedar. The groove-and-tongue joint locks as the stave seats fully.
- Tension the bands. Using the band tensioner tool included in the kit, tighten each band gradually and evenly — one full turn at a time, working around all bands before returning to any single one. Tap the staves with the mallet between tensioning passes to seat them. Final tension: the staves should feel solid with no rocking and no visible gaps at the joints.
Typical assembly time for two people: 4 to 8 hours depending on kit complexity and experience.
Step 4: Install the door and windows
Most kits include a prehung door unit that drops into a pre-framed opening in one end wall. The door frame is built into the end ring assembly — you do not need to create a rough opening.
Door installation:
- Lift the prehung door assembly into the opening.
- Shim the frame level and plumb from inside.
- Drive the included fasteners through the frame into the end ring.
- Check that the door swings freely and closes flush, with no more than 1/8-inch gap at any point.
- Apply a bead of high-temperature silicone (rated for 300°F+) along the inside perimeter where the door frame meets the end stave.
Sauna doors must swing outward and latch with a magnetic catch — never install an interior lock of any kind. If a person loses consciousness inside, they must be pullable out from outside without a key.
If your kit includes a window in the opposite end wall, install it the same way: drop into the pre-framed opening, shim, fasten, and seal the interior perimeter with silicone.
Step 5: Install the heater
Wood-burning stove. The stove sits on its legs on the interior floor, positioned as specified by the kit — typically centered in the front half with the flue exit aligning with the roof penetration.
- Assemble the flue sections per the stove manual. Double-wall insulated flue pipe (Class A) is required for any section that passes through the roof — single-wall sections are for interior only.
- Route the flue through the included stainless steel roof collar. The collar is typically pre-installed in the kit; the flue slides through it and locks with a set screw.
- Cap the exterior with a rain cap and secure with the included flashing clamp.
- Maintain 2 inches of clearance between the single-wall flue sections and any combustible surface. The insulated Class A flue needs only 2 inches of clearance.
- Load the stone basket: volcanic sauna stones only (see below), filled to the fill line marked on the basket. Do not overfill — stones need room for the air and steam cycle that produces proper sauna heat.
Electric heater. Wall-mount per the manufacturer instructions. Run the 240V conduit through a weathertight penetration in the end wall or floor, connect to a weatherproof exterior disconnect box, and run the service conductors back to your panel. Most residential barrel sauna electric setups use a 4–6 kW heater on a 40A 240V circuit. Budget $400–1,000 for an electrician to run this circuit from a typical residential panel.
Step 6: Build the interior benches
The standard barrel sauna bench is an L-shape or U-shape in the back third of the barrel interior, with upper and lower levels.
Heights:
- Upper bench: 18 inches below the ceiling arc at the center of the barrel (this puts bathers in the hottest air zone — typically 170–185°F when the stove is running well)
- Lower bench: 18 inches above the floor (comfortable seat height; also serves as a step up to the upper bench)
Materials: Clear kiln-dried cedar throughout. Use 1x4 cedar slats with 3/8-inch gaps between each — the gaps prevent sweat from pooling and allow airflow under bathers. Fasten from below with stainless steel screws countersunk so no fastener head is exposed to skin contact.
Bench depth: Upper bench at 18–24 inches (deep enough to lie down or sit with legs extended). Lower bench at 16–18 inches. This is enough to sit comfortably and recline against the curved inner barrel wall.
Most kits include a pre-cut bench kit with pre-drilled slats. If yours does, dry-fit before fastening and confirm that the upper bench height hits the 18-inch-below-ceiling target inside your specific barrel diameter.
Step 7: Exterior finish and first heat cycle
Sand. Before any finish, sand the exterior stave surfaces with 120-grit paper, then 180-grit. This removes mill marks, opens the grain, and ensures the finish penetrates rather than sitting on top.
Finish. Apply a UV-protective penetrating wood oil — Sikkens Cetol, Cabot Australian Timber Oil, or a dedicated sauna exterior oil. Two thin coats, with the first coat allowed to dry fully before the second. Never use polyurethane or film-forming finishes: they trap moisture inside the stave assembly, which leads to cupping, splitting, and rot. Reapply every 12 months.
Burn-in. Before your first session, run a 2-hour burn-in with the door slightly ajar:
- Heat the stove to full output (target 180–190°F inside the barrel).
- Run for 2 hours to off-gas resins from new cedar and manufacturing oils from the heater components.
- After shutdown, open the door fully for 30 minutes to ventilate.
- Wipe any visible sap spots from the benches with a dry cloth and allow to cool completely.
The burn-in smell — cedar resin and new metal — clears fully by the second session.
Essential gear to buy
Best for buyers who want a complete, high-quality barrel sauna kit with all hardware included
Dundalk LeisureCraft Outdoor Barrel Sauna Kit (6 ft Cedar)
Dundalk LeisureCraft is one of the most respected barrel sauna kit manufacturers in North America. Kits arrive with pre-curved kiln-dried white cedar staves, stainless steel bands, prehung tempered glass door, and bench lumber. The 6-foot diameter model is the most popular — fits 2 to 3 people with a comfortable upper and lower bench system. Assembly time is 8 to 12 hours for two people. All staves are pre-numbered so there is no measuring or cutting required.
★★★★★ 4.7 · 1,240 reviews
Check current price on Amazon→Best for wood-burning barrel sauna setups requiring no electrical connection
Harvia M3 Wood-Burning Barrel Sauna Stove
The Harvia M3 is a compact, high-output wood-burning sauna stove purpose-built for barrel and small cabin saunas up to 212 cubic feet. Cast iron firebox, stainless steel stone basket, and 55 lbs of stone capacity. Reaches 180F in 45 to 60 minutes from cold on a load of split hardwood. Ships with a rear flue outlet — compatible with 5-inch Class A insulated flue pipe. No electrical required. Weight is 77 lbs, so plan for two people to position it.
★★★★★ 4.8 · 890 reviews
Check current price on Amazon→Best for loading any wood-burning or electric sauna stove to proper capacity
Finnish Volcanic Sauna Stones (22 lbs)
Sauna stones are not interchangeable with landscaping gravel or river rock — use purpose-made volcanic stones (olivine diabase or peridotite) that withstand repeated heat cycling without cracking or exploding. Cracked stones release silica dust and damage the stone basket. Finnish-sourced volcanic stones are the standard: dense, high thermal mass, and rated for continuous 200F use. A 22-lb bag fills most residential sauna stove baskets to the fill line.
★★★★★ 4.6 · 2,100 reviews
Check current price on Amazon→FAQ
Frequently asked questions
How long does it take to build a barrel sauna from a kit?
Do I need a permit to build a barrel sauna in my backyard?
What wood is used to build a barrel sauna?
Can I heat a barrel sauna with a wood-burning stove?
How do I maintain a barrel sauna?
How big should a barrel sauna be for two people?
Bottom line
Building a barrel sauna from a kit is a genuine one-weekend project — one of the most satisfying DIY builds in the outdoor living category, with a payback of years of daily use. Get the foundation level, follow the stave assembly sequence without rushing, use Class A flue pipe through the roof, and finish the exterior before that first heat cycle. The result is a permanent outdoor retreat that needs only annual oiling to stay in top condition for decades.
Before you build, see the best barrel saunas roundup for kit comparisons and size guidance. For heater options across wood and electric, read the best sauna heaters guide. If you want the full outdoor sauna planning picture — site layout, permits, and cost estimates — the outdoor sauna plans guide covers it. And if a wood-stove barrel sauna is your goal, the outdoor saunas with wood stove roundup has specific model picks with heating output data.