guides
How to Install a Sauna Heater
Step-by-step guide to mounting, wiring, and testing an electric or wood sauna heater — tools, clearances, stone loading, and first-use checklist.
 Marcus Reade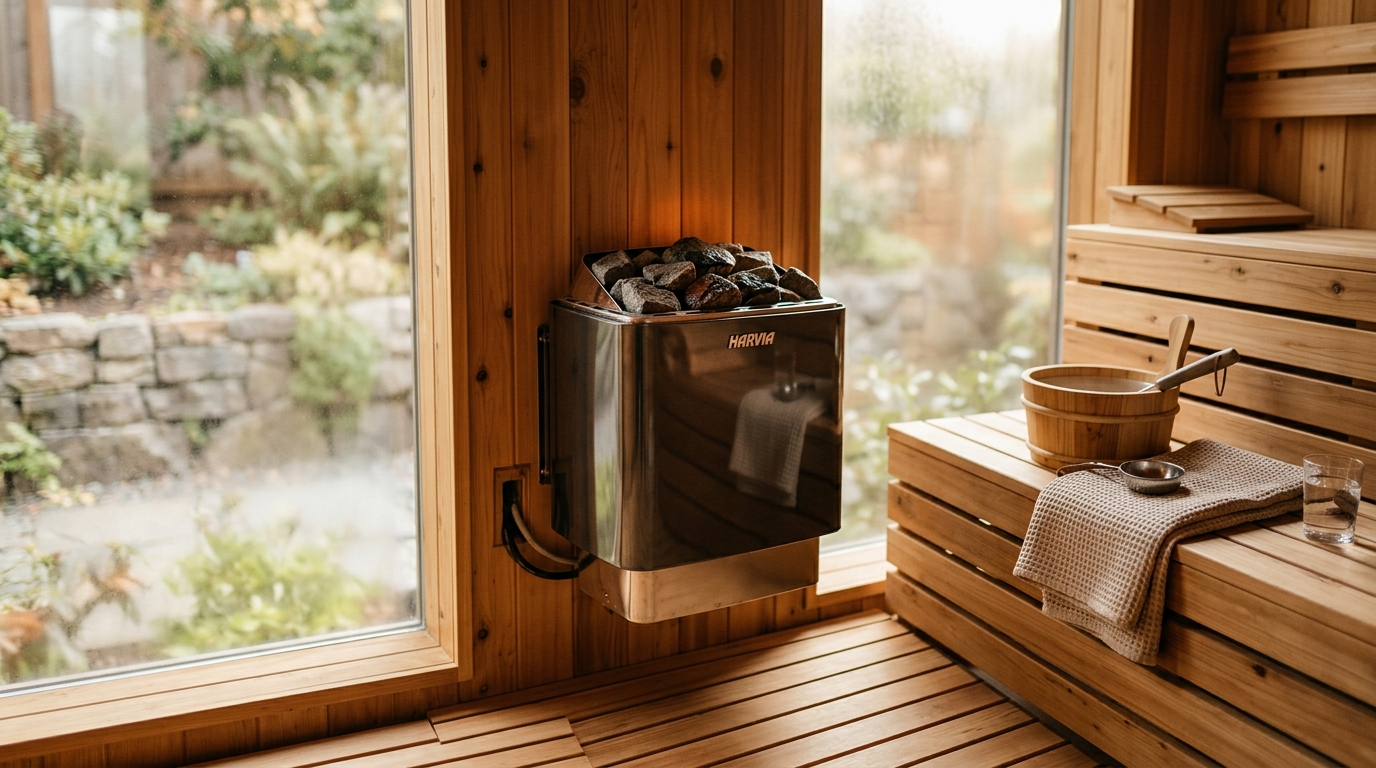
Installing an electric sauna heater takes about 2–4 hours once your room is finished — the heater mounts in under an hour, but the 240V dedicated circuit must be run by a licensed electrician. For a wood-burning heater, budget a full day to account for flue assembly. Both follow the same core sequence: establish clearances, mount the unit, connect power or install the flue, load the stones, and run a burn-in test.
What you need before starting
Before you order a heater or lift a drill, two things must already be in place: a finished sauna room and a committed electrical plan.
Finished room first. The heater is the last major installation step. Insulation must be complete, vapor barrier and paneling must be installed on all walls and the ceiling, and the benches must be built. Installing a heater into an unfinished room wastes the burn-in and can damage the unit if construction debris enters the stone load.
Electrical plan confirmed. For an electric heater, confirm with a licensed electrician that your electrical panel has capacity for a dedicated 240V circuit of the right amperage before purchasing the heater. A 6 kW heater needs a 30A circuit; a 9 kW heater needs a 40–50A circuit. If your panel is near capacity, you may need a panel upgrade — budget $1,000–3,000 for that scenario. Clarify this before you buy.
For a wood-burning heater, identify the flue path — through an exterior wall or through the ceiling and roof — and confirm it clears any structural members and meets local code for chimney setback from combustibles.
Step 1: Gather your tools and materials
For both heater types, you will need:
- Tape measure and pencil
- Level (4-foot preferred)
- Stud finder
- Drill with assorted wood bits
- Lag screws or mounting bolts (often included with the heater)
- Torque wrench or screwdriver
For electric heaters, additionally:
- Wire strippers (electrician will use these)
- High-temperature rated wire and conduit (electrician supplies)
- Junction box rated for sauna use (mounts outside the door)
For wood-burning heaters, additionally:
- Insulated double-wall flue pipe sections (sized to match the heater’s collar — typically 5 or 6 inches)
- Flue thimble and wall shield for the wall penetration
- Exterior chimney cap
- High-temp sealant rated for flue pipe connections
- Tin snips and sheet metal screws
Have all materials on-site before the installation day. Missing a flue section or the correct lag bolt size will stall the project.
Step 2: Calculate and mark clearance distances
Clearance violations are the number-one cause of sauna heater code failures and fire risks. Get this right before drilling a single hole.
Retrieve your heater’s installation manual. Every model specifies its own minimum clearances — do not use generic numbers. The typical requirements for most residential electric heaters are:
- Side walls: 4–6 inches from the heater body to the nearest side wall
- Bench clearance: 8–18 inches from the stone load to the nearest bench surface (the manual will specify whether this is measured to the stone top or the heater body)
- Overhead clearance: 12–16 inches from the top of the heater to the ceiling (some models require 8 inches minimum)
- Guard rail: Required if any bench surface is within 18 inches of the stone load on most models — this is a code requirement in most jurisdictions
Mark these clearance zones on the floor and walls with painter’s tape before mounting anything. Step back and verify that the heater position you have marked keeps the unit clear on all sides. A heater positioned too close to a bench will require a full re-mount.
Choosing the wall. The heater should go on the wall opposite or adjacent to the benches, not directly below the benches. Floor-standing units sit in the corner or against the center of the end wall. Wall-mounted units typically go at bench height or just below — check the manual.
Step 3: Mount the heater
Floor-standing electric heaters
Most residential electric heaters (6 kW and above) are floor-standing with a back panel that bolts to the wall for stability.
- Position the unit at your marked location.
- Hold it plumb and level using your level.
- Mark the wall through the mounting holes on the back panel.
- Remove the heater and pre-drill the marked holes. If mounting into studs, use lag screws (typically 3/8 × 2-1/2 inches). If mounting into paneling without a stud, use wall anchors rated for the heater weight — consult your manual for the weight spec.
- Reposition the heater and bolt it to the wall. Tighten to the torque spec in the manual. Do not overtighten into soft cedar paneling.
- Confirm the unit sits level and plumb again after tightening.
Wall-mounted electric heaters
Wall-mounted units use a steel mounting bracket that attaches to the wall first; the heater body then clips onto the bracket.
- Mark the bracket position using the template provided in the manual (or the bracket itself as a template).
- Locate studs at the mounting height. At least two mounting screws should hit studs for secure support.
- Attach the bracket to the wall with lag screws. Check level.
- Hang the heater body on the bracket and secure any locking clips or bolts.
Wood-burning heaters
Wood heaters are heavier — the Harvia M3 weighs approximately 110 lbs loaded. Position on non-combustible flooring or install a required floor protector first. Mount the legs or stand per the manual; most wood heaters do not bolt to the wall but sit on a floor protector pad. Confirm the unit is level and stable before assembling the flue.
Step 4: Connect the power (electric) or install the flue (wood)
Electrical connection — electric heaters
Stop here if you are not a licensed electrician. All wiring work from this point must be done by a professional. Describe the heater’s electrical requirements to your electrician:
- Heater wattage and voltage (e.g., 8 kW, 240V)
- Required amperage and breaker size (per the manual)
- Location of the junction box (outside the sauna door within arm’s reach)
- Location of the control panel mounting point (outside the door, at convenient height)
The electrician will run a dedicated circuit from your panel to a junction box outside the sauna door, then connect the heater leads through a hole in the sauna wall. High-temperature wire rated for sauna use is used for the short run inside the room. The control panel mounts outside the door on a standard wall box — the control cable runs through the wall to the heater. Do not route the control cable through the same opening as the power leads.
Once the electrician completes the work, verify:
- Correct breaker size installed and labeled
- Control panel properly secured and the power LED or display lights on
- No visible damage to wire jacketing inside the sauna
Flue installation — wood-burning heaters
- Install the flue thimble. The thimble is the fire-rated wall collar that provides the correct clearance between the flue pipe and the combustible wall. Cut the wall opening to the thimble’s spec dimensions. Install the thimble and secure it flush with the wall surface.
- Assemble the flue pipe sections. Connect double-wall insulated flue pipe sections from the heater collar upward through the thimble, following the manufacturer’s sequence for locking the sections together. Apply high-temp sealant at interior joints per the manual.
- Install the exterior cap. Outside the wall, attach the flue cap to prevent rain and pest entry. Confirm the cap is above any snow accumulation height for your climate.
- Check all connections. Every joint should be locked or screwed. Shake the flue stack gently — it should be rigid with no movement at any joint.
Step 5: Load the sauna stones
Stone loading is a step many first-time builders rush. Done incorrectly, it reduces löyly quality and can damage the heater elements.
Choose the right stones. Use only stones rated for sauna use:
- Finnish peridotite (olivine-based) — the Finnish standard; dense, crack-resistant, excellent löyly
- Diabase (also called dolerite) — common in Scandinavian sauna heaters; good longevity
- Granite and gabbro — acceptable alternatives widely sold for sauna use
Never use river rocks, sandstone, limestone, or landscaping stone. These contain moisture pockets or sedimentary layers that crack or explode under repeated thermal cycling and sudden water contact.
How to load the stones:
- Inspect each stone before use. Discard any with existing cracks.
- Place the largest stones at the bottom of the stone cavity, filling around the heating elements without resting stones directly on element surfaces.
- Work upward in layers of decreasing stone size.
- Fill to the manufacturer’s fill line — typically marked on the inside of the stone guard. Overfilling restricts airflow and causes the top elements to overheat.
- Leave visible gaps between stones so water ladled on top can flow down and create steam rather than sitting on the surface.
| Product | Best for | Rating | Notes | |
|---|---|---|---|---|
| Electric heater installation | Indoor and basement saunas; existing structures | ★★★★★ | Heater mounts in 1 hr. Electrician adds 2-4 hrs. Total: half to full day. Cost: heater + $200-600 electrical. | Check price |
| Wood heater installation | Outdoor cabins, barrel saunas, off-grid builds | ★★★★☆ | Heater mounts in 1 hr. Flue assembly adds 3-6 hrs. Total: full day. Cost: heater + $800-2,500 flue work. | Check price |
| Wall-mounted compact electric | Smaller rooms under 200 cu ft; 1-2 person saunas | ★★★★☆ | Lightest installation — bracket mounts in 30 min. Same 240V wiring requirement. | Check price |
Step 6: Run the burn-in test
Do not invite anyone into the sauna for the first session. The burn-in serves two purposes: it cures manufacturing residues from the stones and heater elements, and it lets you verify safe operation before anyone is inside.
Electric burn-in procedure:
- Set the thermostat to maximum temperature.
- Run the heater for 2 hours with the sauna door closed and no one inside.
- Ventilate the sauna after the burn-in — open the door and leave it for 30 minutes to exhaust any manufacturing odors.
- A faint metallic or resin smell during the first burn-in is normal. Heavy smoke or burning plastic smell is not — shut off and call the electrician.
Wood heater burn-in procedure:
- Build a small fire — roughly 20% of the wood load you would use for a normal session.
- Let it burn through completely.
- Add a second moderate fire and let it burn to coals.
- Ventilate the room.
First löyly test:
After the burn-in, run a normal heat-up session. Once the sauna is at temperature (typically 30–45 minutes for electric, 60–90 for wood), ladle a small amount of water — about 2 oz — onto the stone center. A sharp hiss and good steam burst indicates correct stone loading and temperature. If the water pools on the stones without much steam, the stones are not yet hot enough or are packed too tightly.
Recommended heaters for installation
Best electric for home installation
Best for rooms 200-450 cubic feet — basement builds, indoor saunas, room conversions
Harvia KIP 80B Electric Sauna Heater 8kW
The Harvia KIP series is the professional standard for home sauna installation. The 8 kW model covers rooms up to 450 cubic feet, comes with a digital external control panel (required for code compliance), and includes a detailed installation manual with clearance specs. Finnish manufacturing, 5-year element warranty, and parts widely available in North America. The most straightforward electric install on the market.
★★★★★ 4.7 · 1,240 reviews
Check current price on Amazon→Pros
- Detailed installation manual with exact clearance specs and wiring diagrams
- 5-year element warranty; replacement stones and parts available from US distributors
- Digital controller with timer mounts outside sauna door per code requirements
- Available from 3.5 kW to 11 kW to cover any room size
- Finnish-made to the same spec as commercial hotel and spa installations
Cons
- Higher price than budget brands — though justified by build quality for daily use
- Requires a licensed electrician for the 240V circuit — cannot avoid this cost
- Stone guard is sold separately for some kW variants
Best budget electric for smaller rooms
Best for first-time sauna builds under 250 cubic feet; budget installations where premium quality is secondary
Vevor Electric Sauna Heater 6kW with Control Panel
Vevor delivers a reliable ETL-listed electric sauna heater at roughly half the price of Finnish brands. The 6 kW unit ships with sauna stones, an external digital control panel with timer and thermostat, and all mounting hardware. Installation follows the same steps as premium brands. A practical choice for a first build where you want to confirm the sauna habit before investing in a premium unit.
★★★★☆ 4.4 · 890 reviews
Check current price on Amazon→Pros
- Roughly half the cost of comparable Finnish brands
- Ships with sauna stones, control panel, and mounting hardware included
- ETL listed for US residential installation
- Digital timer and thermostat on external control panel
Cons
- Expect a 5-8 year service life under daily use vs 10-15 years for Finnish brands
- Included stones are smaller than Finnish spec; consider upgrading to Finnish peridotite for better löyly
- Same 240V wiring cost applies regardless of heater brand
Best wood-burning heater for outdoor saunas
Best for detached outdoor cabins, barrel saunas, and off-grid installations
Harvia M3 Wood Burning Sauna Heater
The Harvia M3 is the world-standard wood-burning kiuas, used in traditional Finnish saunas for decades. The large cast-iron firebox accepts standard split firewood without size sorting. The 110-lb stone capacity delivers outstanding löyly at high temperatures. It heats rooms up to 530 cubic feet with no electricity required — just a correctly installed flue. The benchmark for outdoor sauna installation.
★★★★★ 4.8 · 760 reviews
Check current price on Amazon→Pros
- World-standard wood-burning kiuas with a 30-year proven track record
- 110 lb stone capacity for exceptional high-temperature löyly
- Large firebox door accepts full-size split firewood
- No electricity required — completely off-grid capable
Cons
- Flue installation adds $800-2,500 to total project cost
- Requires 45-90 minutes of fire prep before each session
- Ash removal required after every use
- Building permit required for solid-fuel appliance installation in most jurisdictions
What to skip
Installing the heater before the room is finished. Drywall dust, sawdust, and construction debris contaminate the stones and clog the element guard. Finish all construction — including staining or sealing benches — before the heater goes in.
Using a single-wall uninsulated flue pipe for a wood heater. Single-wall pipe does not maintain safe clearances to combustibles without a rated wall thimble and very large clearance zones. Use double-wall insulated pipe through any wall or ceiling penetration.
Skipping the stone burn-in. Manufacturing oils on the elements and surface residues on new stones create odors that you do not want inside an occupied sauna. The burn-in also reveals any installation issues — a wiring problem, an unlocked flue joint — while the sauna is unoccupied.
Wiring a 240V heater yourself without an electrician license. In most jurisdictions this is illegal and will prevent your homeowner’s insurance from covering any fire or damage. The electrician cost ($200–600 for a new circuit) is a small fraction of the total project.
FAQ
Frequently asked questions
Do I need a permit to install a sauna heater?
Can I install a sauna heater myself?
How long does sauna heater installation take?
What height should the sauna heater be mounted at?
How often do sauna stones need to be replaced?
Bottom line
Installing a sauna heater is a structured process with clear steps: finish the room first, confirm your electrical capacity, mount the heater with correct clearances, have a licensed electrician wire the circuit, load the stones properly, and run a burn-in test before anyone steps inside.
For most home builds, the right starting point is the Harvia KIP 8 kW — clear installation documentation, 5-year warranty, and parts available everywhere. Budget-constrained first builds can use the Vevor 6 kW and upgrade later. Outdoor cabins belong with the Harvia M3 and a correctly installed double-wall flue.
Once your heater is running, see our sauna temperature guide for the optimal heat-up settings, the how to choose a sauna heater guide if you are still deciding between models, and our how to maintain a sauna guide to keep the heater and stones in top condition for years.